2 avril 2025
Document Picture-in-Picture, Pip for any HTML content
6 minutes de lecture

Picture-in-Picture mode is mostly used to detach a video player into a floating window that is constantly visible and on top, while continuing to browse a page.
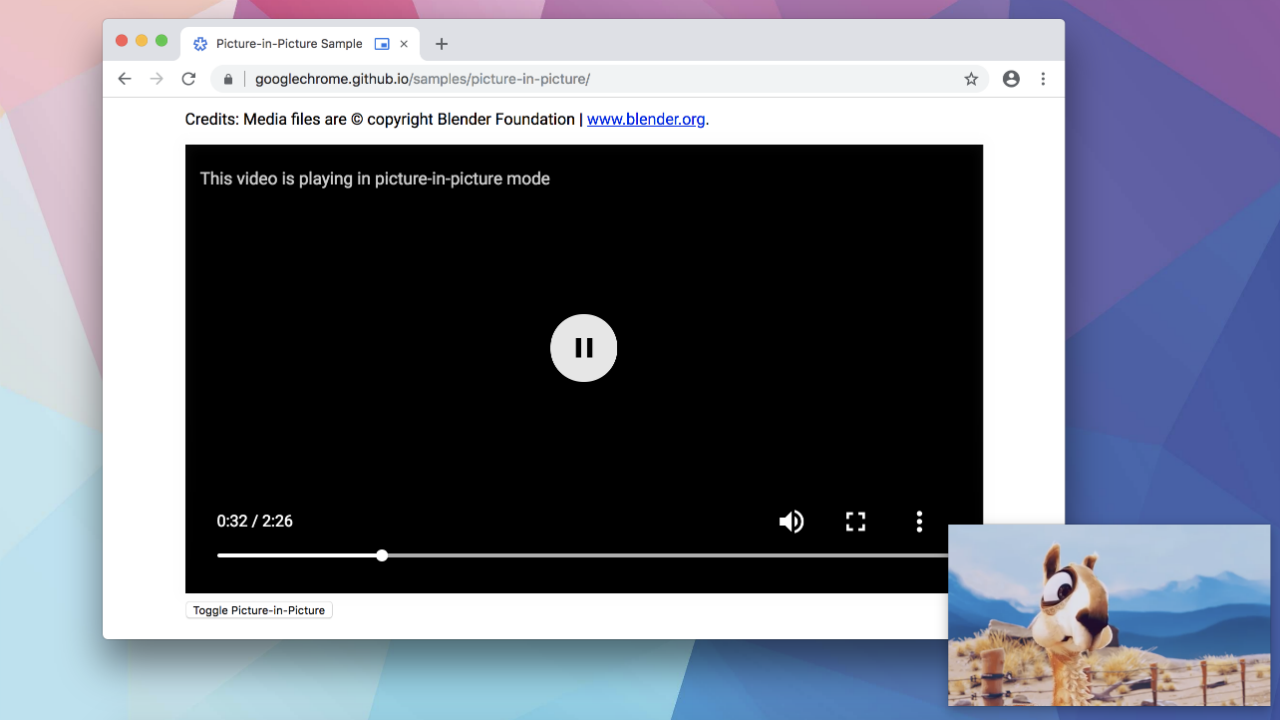
But, in this article, I want to talk about another similar API: The Document Picture-in-Picture (PiP) API.
It takes this idea of a floating window a bit further. Instead of being limited to videos, it allows you to display any HTML document in a PiP window. It allows for the creation of innovative user experiences and new ways of designing interfaces.
In this article, we will see how to use this API before exploring innovative use cases that leverage its potential.
This API is only supported by Chrome, starting from version 116. If needed, there's a flag to enable/disable this feature chrome://flags/#document-picture-in-picture-api.
How the API Works
The API relies on a global object, documentPictureInPicture, which offers several entry points to interact with a Picture-in-Picture window dedicated to any HTML content. Here are the main features:
Main Property
documentPictureInPicture.window
This property returns the active PiP window if it exists, otherwise it returns null. It allows direct access to the window content to, for example, interact with elements or change its appearance.
Method to Open a Picture-in-Picture Window
documentPictureInPicture.requestWindow(options)
This method is at the center of the API. It opens a new PiP window and returns a promise that resolves into an object representing this window.
The options object can include several parameters to customize the window:
widthandheight: They set the initial size of the PiP window.disallowReturnToOpener: By setting this option totrue, you hide the button to go back to the original tab. Its default value isfalse.preferInitialWindowPlacement: If set totrue, the window opens in its default position and size, ignoring the last configuration used.
The call must be initiated as a result of user interaction (click, key press, etc.). Otherwise, the promise is rejected.
Once a PiP window is instantiated, you can handle it like any other window object.
Usage Example in JavaScript
First of all, given that the API is not supported by all browsers, it's necessary to verify if it's supported before using it.
if ('documentPictureInPicture' in window) {
  // API is supported
}
Now that we know the API is supported, to display HTML content in a PiP window, simply retrieve the HTML content and add it to the PiP window.
pipButton.addEventListener("click", async () => {
  const myContent = document.querySelector("#content");

  const pipWindow = await documentPictureInPicture.requestWindow({
    width: 500,
    height: 500,
  });

  pipWindow.document.body.append(myContent);
});
With a user click, a floating window will be visible (of size 500px x 500px) and will contain the HTML content of the #content element.
Upon creating the window, the PiP document of the latter will be empty. So, of course, you'll need to add your HTML content as we did but also, if needed, add style (same thing for events, you'll have to add them to the new PiP window).
The simplest way is to copy the style of the originating document entirely. For that, you can use the following function:
function copyStyles(pipWindow) {
    [...document.styleSheets].forEach((styleSheet) => {
      try {
        const cssRules = [...styleSheet.cssRules]
          .map((rule) => rule.cssText)
          .join('');
        const style = document.createElement('style');

        style.textContent = cssRules;
        pipWindow.document.head.appendChild(style);
      } catch (e) {
        const link = document.createElement('link');

        link.rel = 'stylesheet';
        link.type = styleSheet.type;
        link.media = styleSheet.media.mediaText;
        link.href = styleSheet.href || '';
        pipWindow.document.head.appendChild(link);
      }
    });
}
To copy all CSS style sheets from the original window, you have to manually go through the styleSheets connected or integrated into the document, and then add them to the Picture-in-Picture window. Be careful, this copy is only done once, the styles will not be updated automatically afterward.
The copyStyleSheets method was supported by Chrome in an earlier version of the API specification but has been removed.
And Voilà, we now have a PiP window that displays HTML content and is styled like the rest of the document.
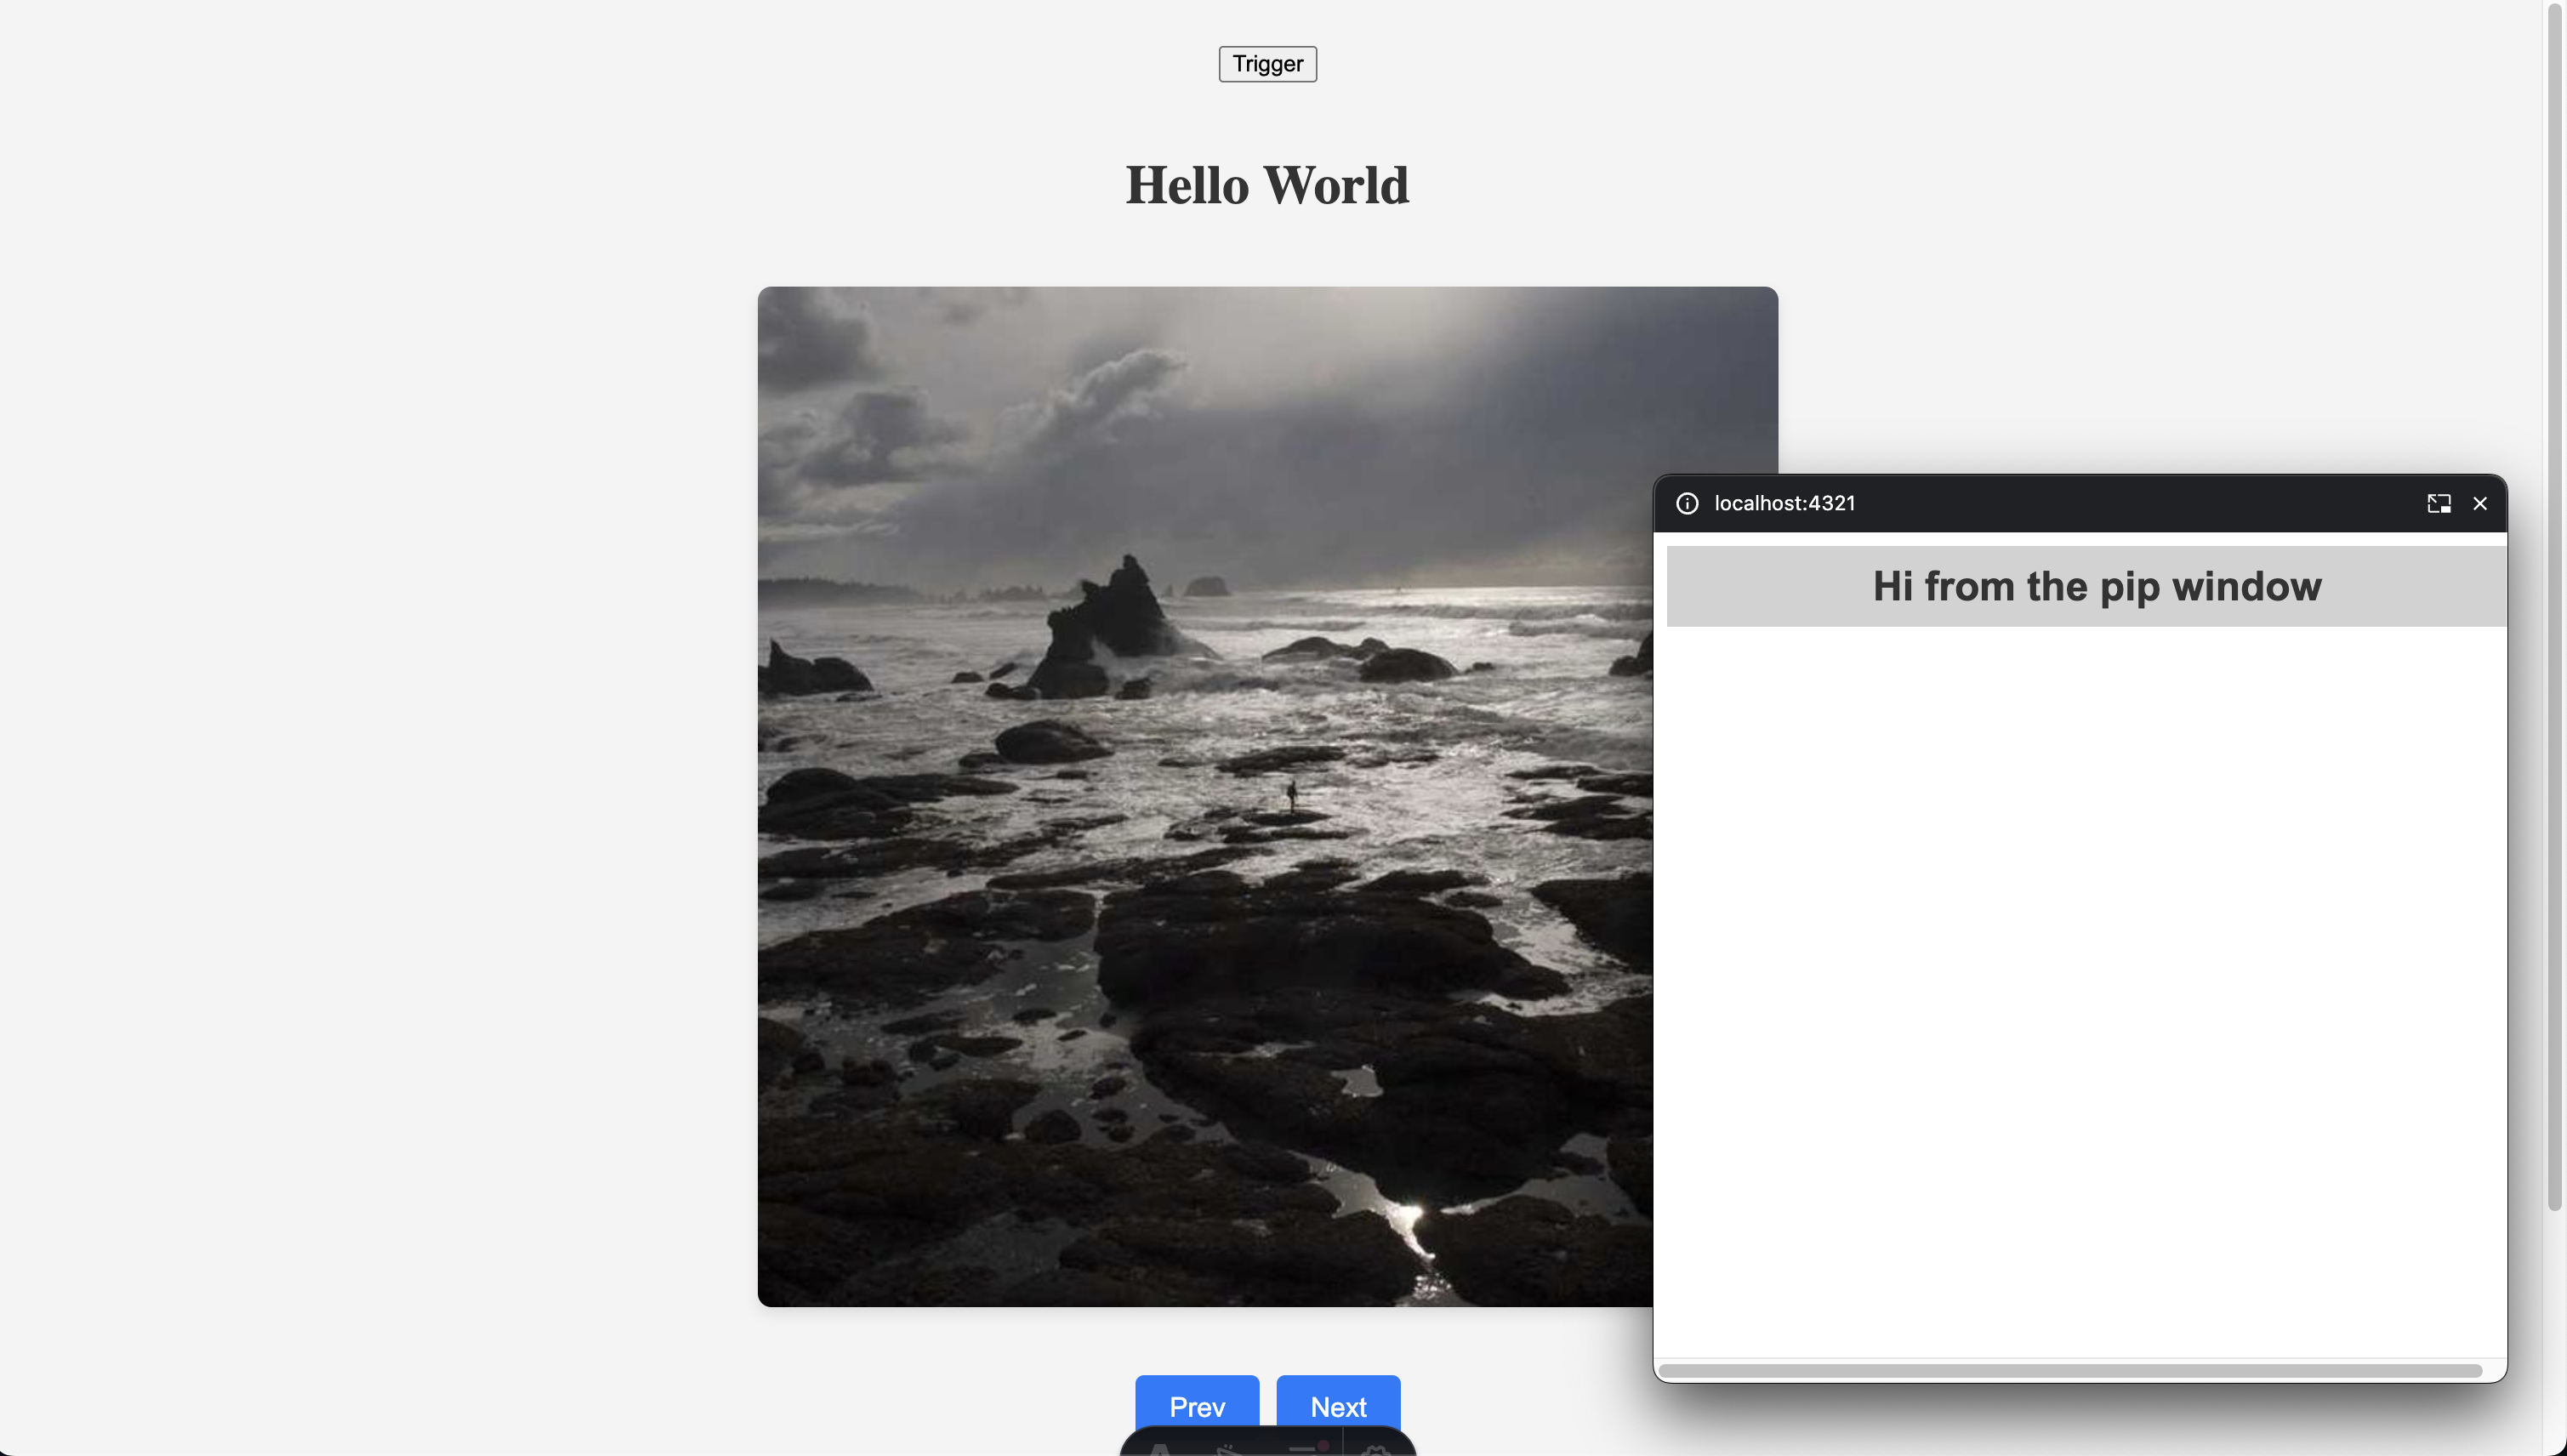
Of course, it is possible to go further by finely customizing the operation and content of the Picture-in-Picture window.
You can listen to/detect its opening, its closing, interact with its content, react via standard HTML document events, etc.
In terms of style, you can also specify style rules that target only the PiP window. Handy for isolating specific style rules for the PiP document without polluting the main document:
@media all and (display-mode: picture-in-picture) {
  body {
    background-color: #000;
    color: #fff;
  }
  h1 {
    font-size: 0.8em;
  }
}
Obviously, there is a React wrapper for this API. But here I wanted to present the API in its native form.
User Interface Use Cases
In this section, I have gathered some concrete and visual use cases to illustrate how this API can improve the user experience, streamline certain interactions, or simply offer a gain in comfort and productivity.
One of the most advanced uses of the Document Picture-in-Picture API to my knowledge is undoubtedly that of Google Meet.
When you detach a meeting via PiP mode, you find a complete and interactive interface in an independent window. You can see participants, enable/disable your microphone, leave the meeting, follow a presentation, raise your hand. Almost all the essential features of a meeting are available in this compact version.
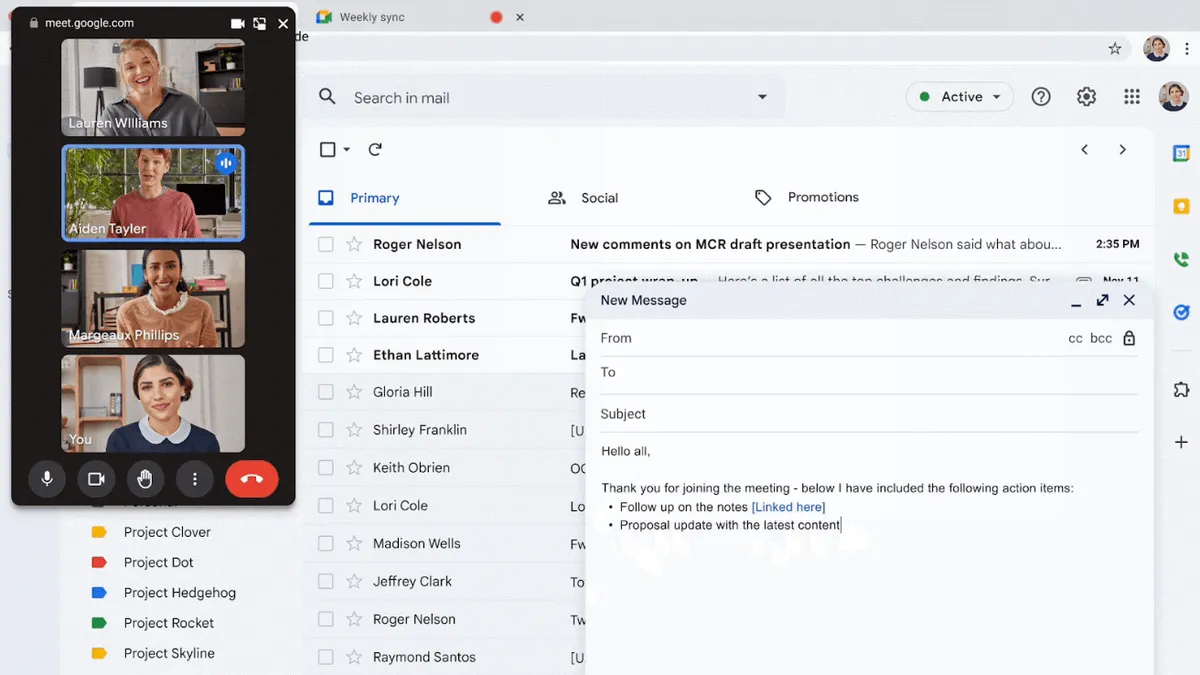
It's an excellent example of what this API allows: stay active in a meeting while pursuing another task, without having to switch between tabs or windows. This makes the experience much more fluid, especially in a multitasking context.
From there, we can imagine all sorts of declinations of usage in application components.
Here are a few other concrete illustrated use cases which show how this API can transform the user interface in different contexts.
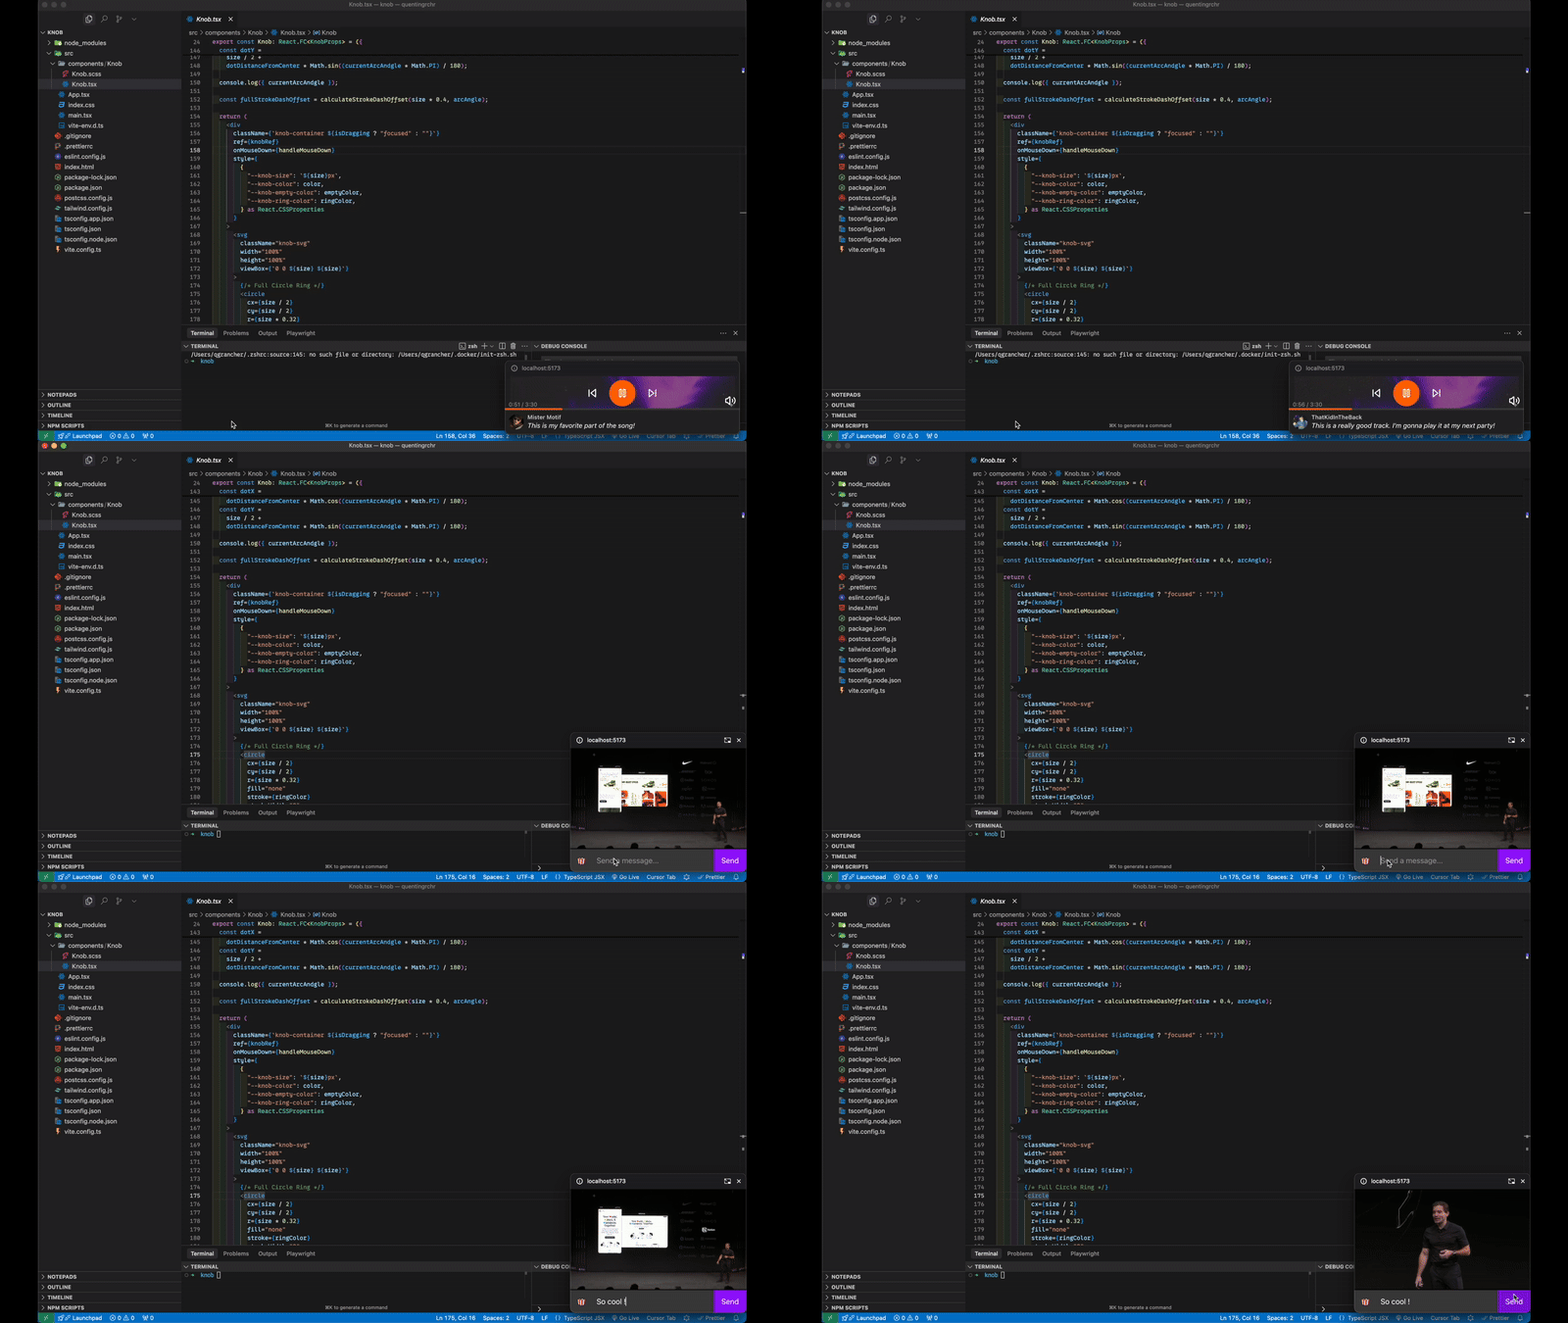
Interactive media player
Here, I designed a small example of a Soundcloud audio player that would display user comments. As well as, a Twitch live where you could comment live.
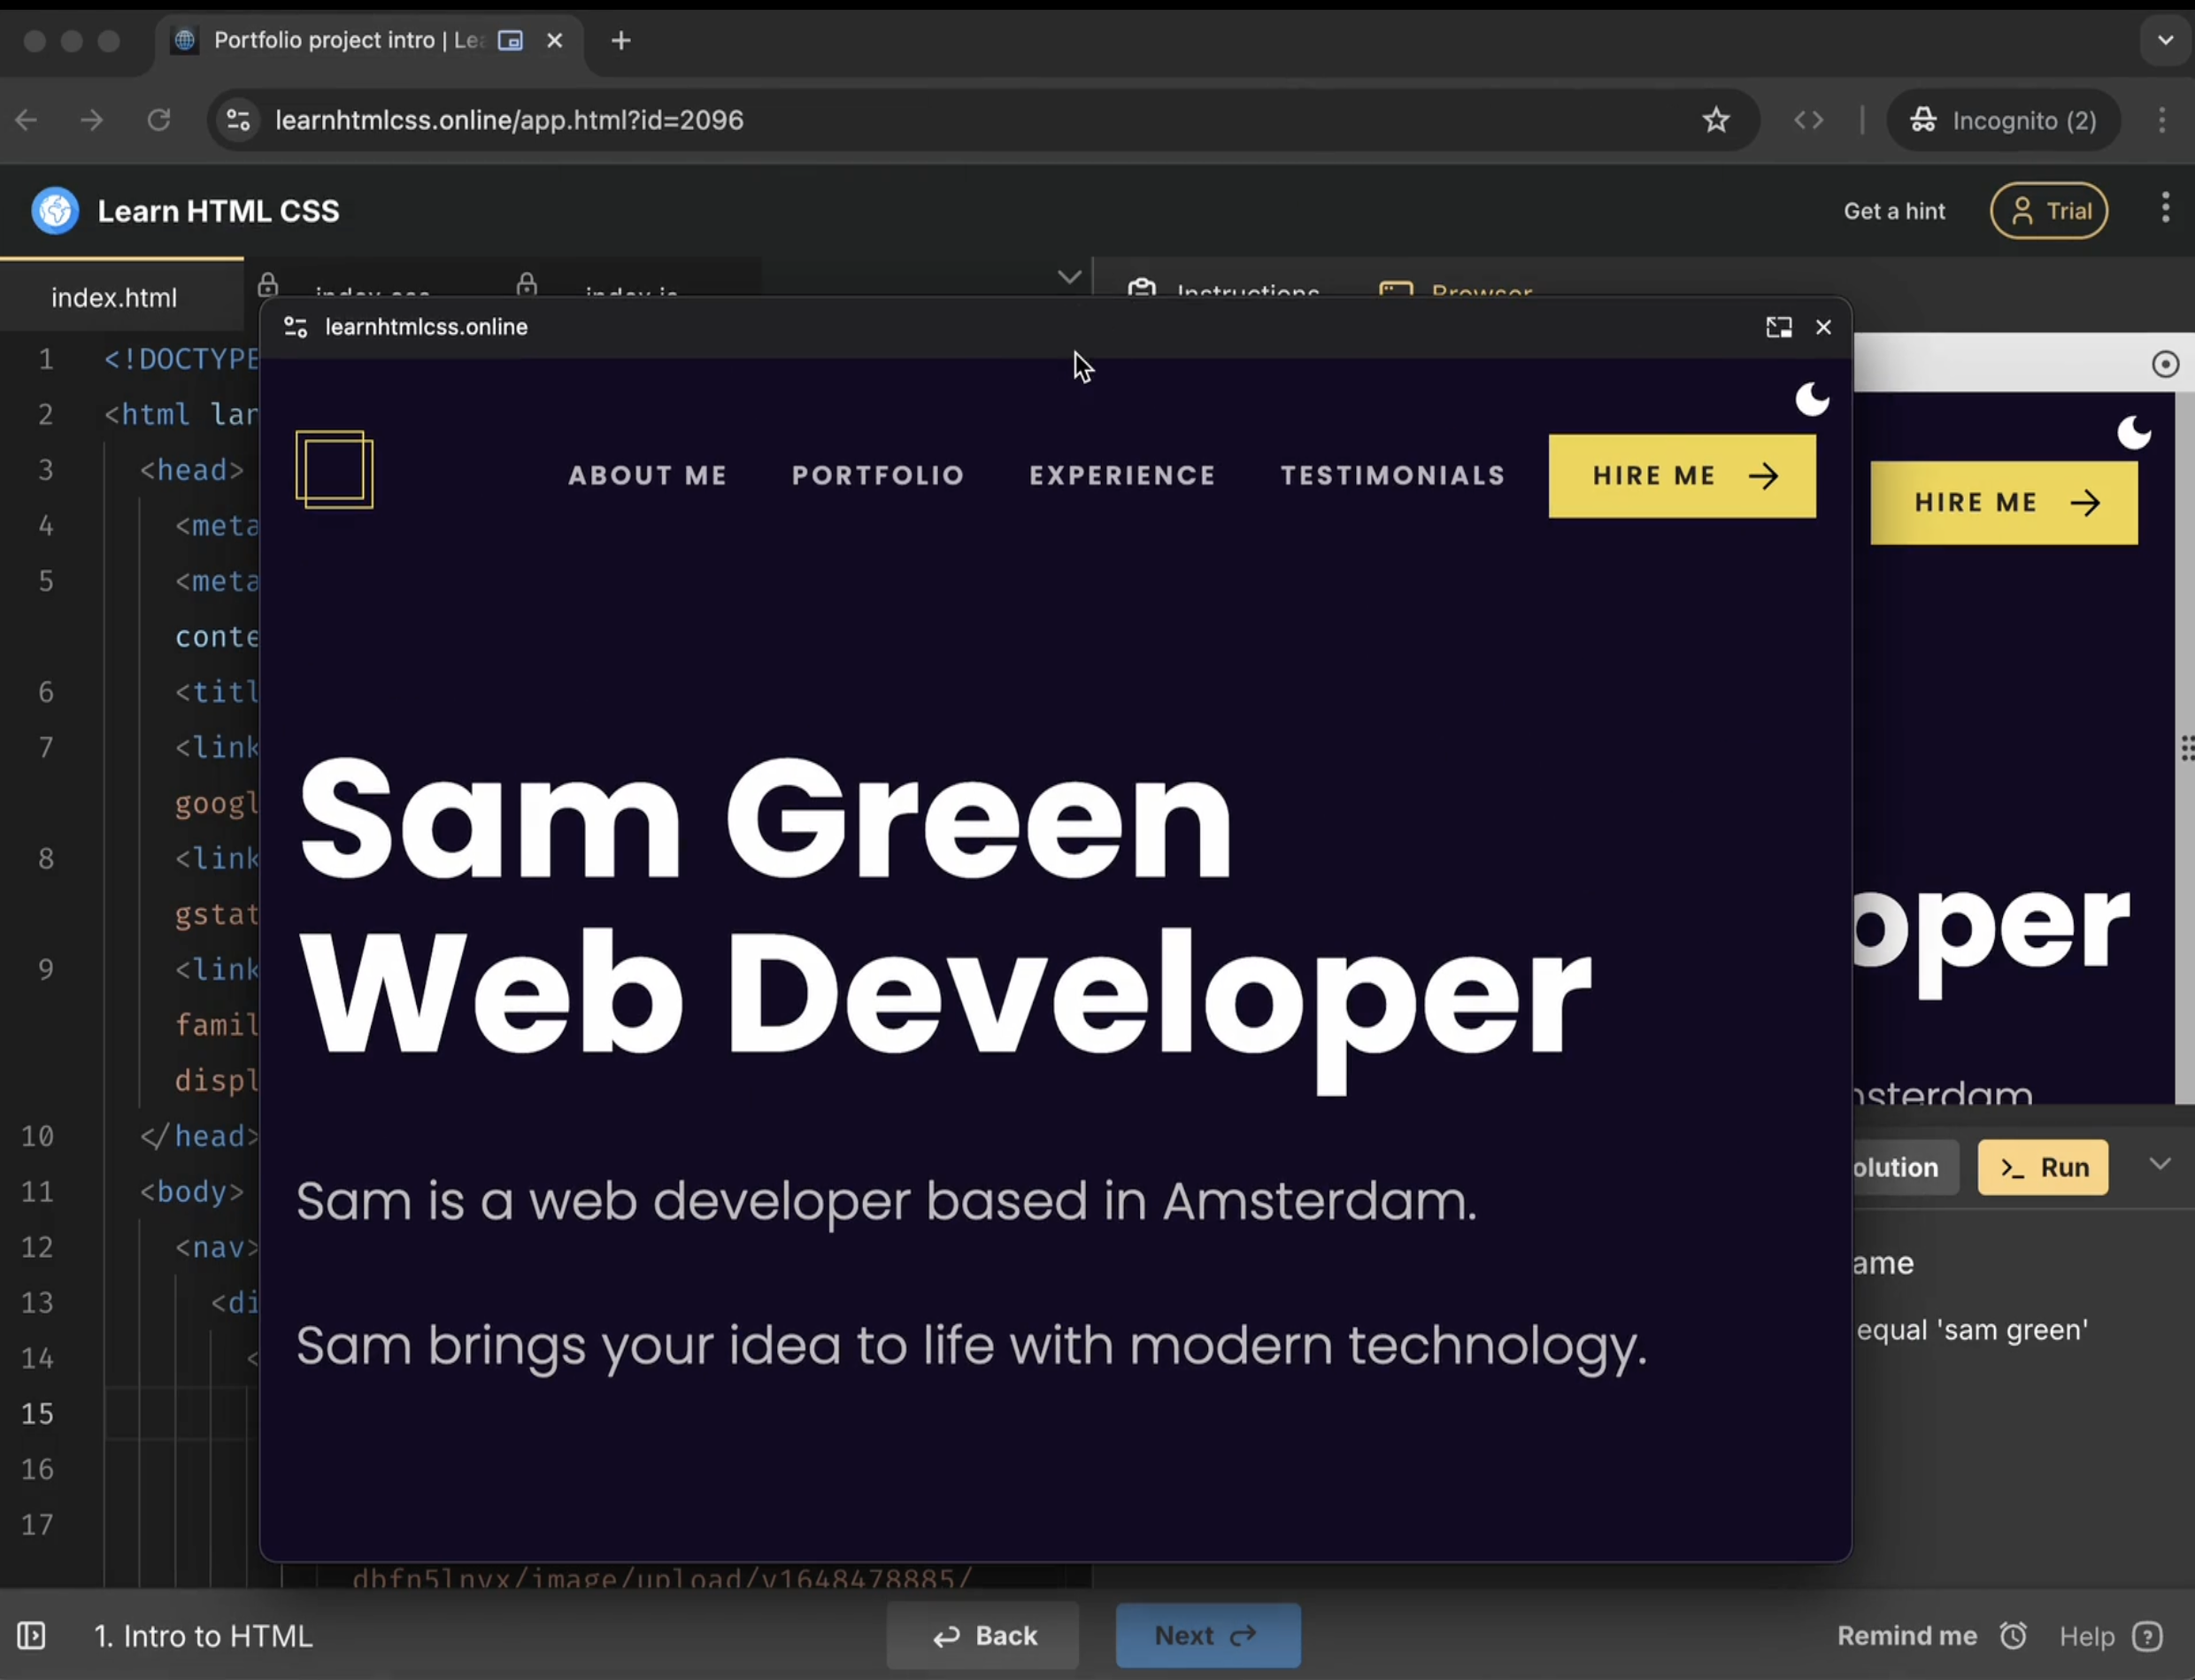
Online text editor
In a web application type code editor with preview, you could display the preview in a floating window. So users with two monitors can take full advantage of the editing interface.
Here I took an example available on the Chrome For Developers website.
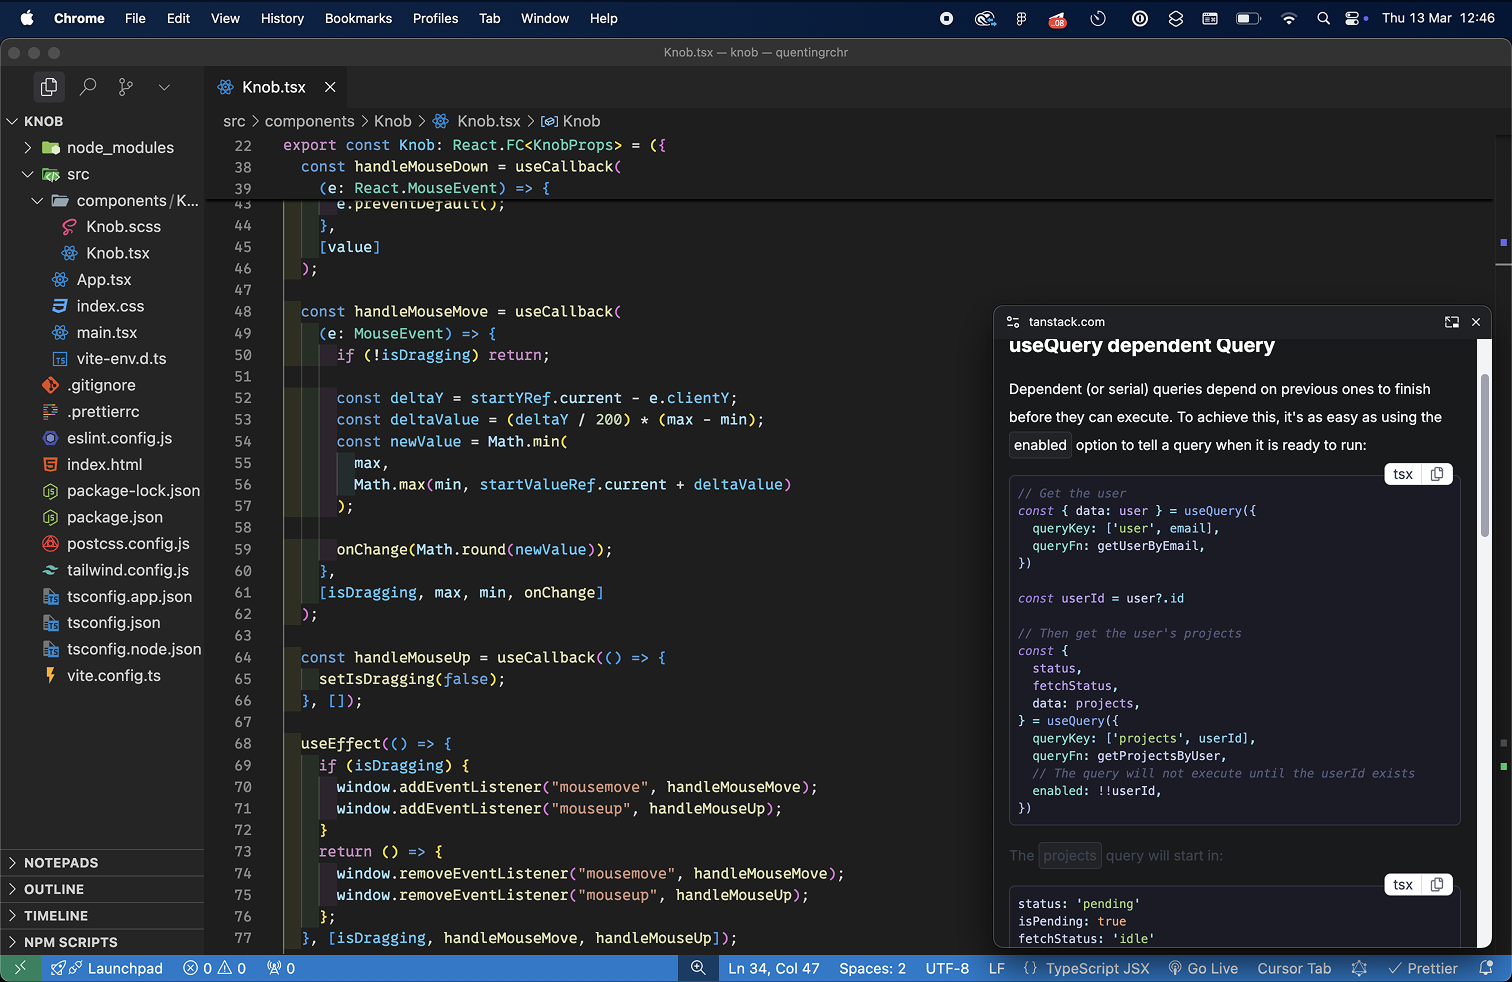
Documentation in floating window
Documentation could incorporate a floating window to have important information readily available. And avoid going back and forth between the documentation and the code.
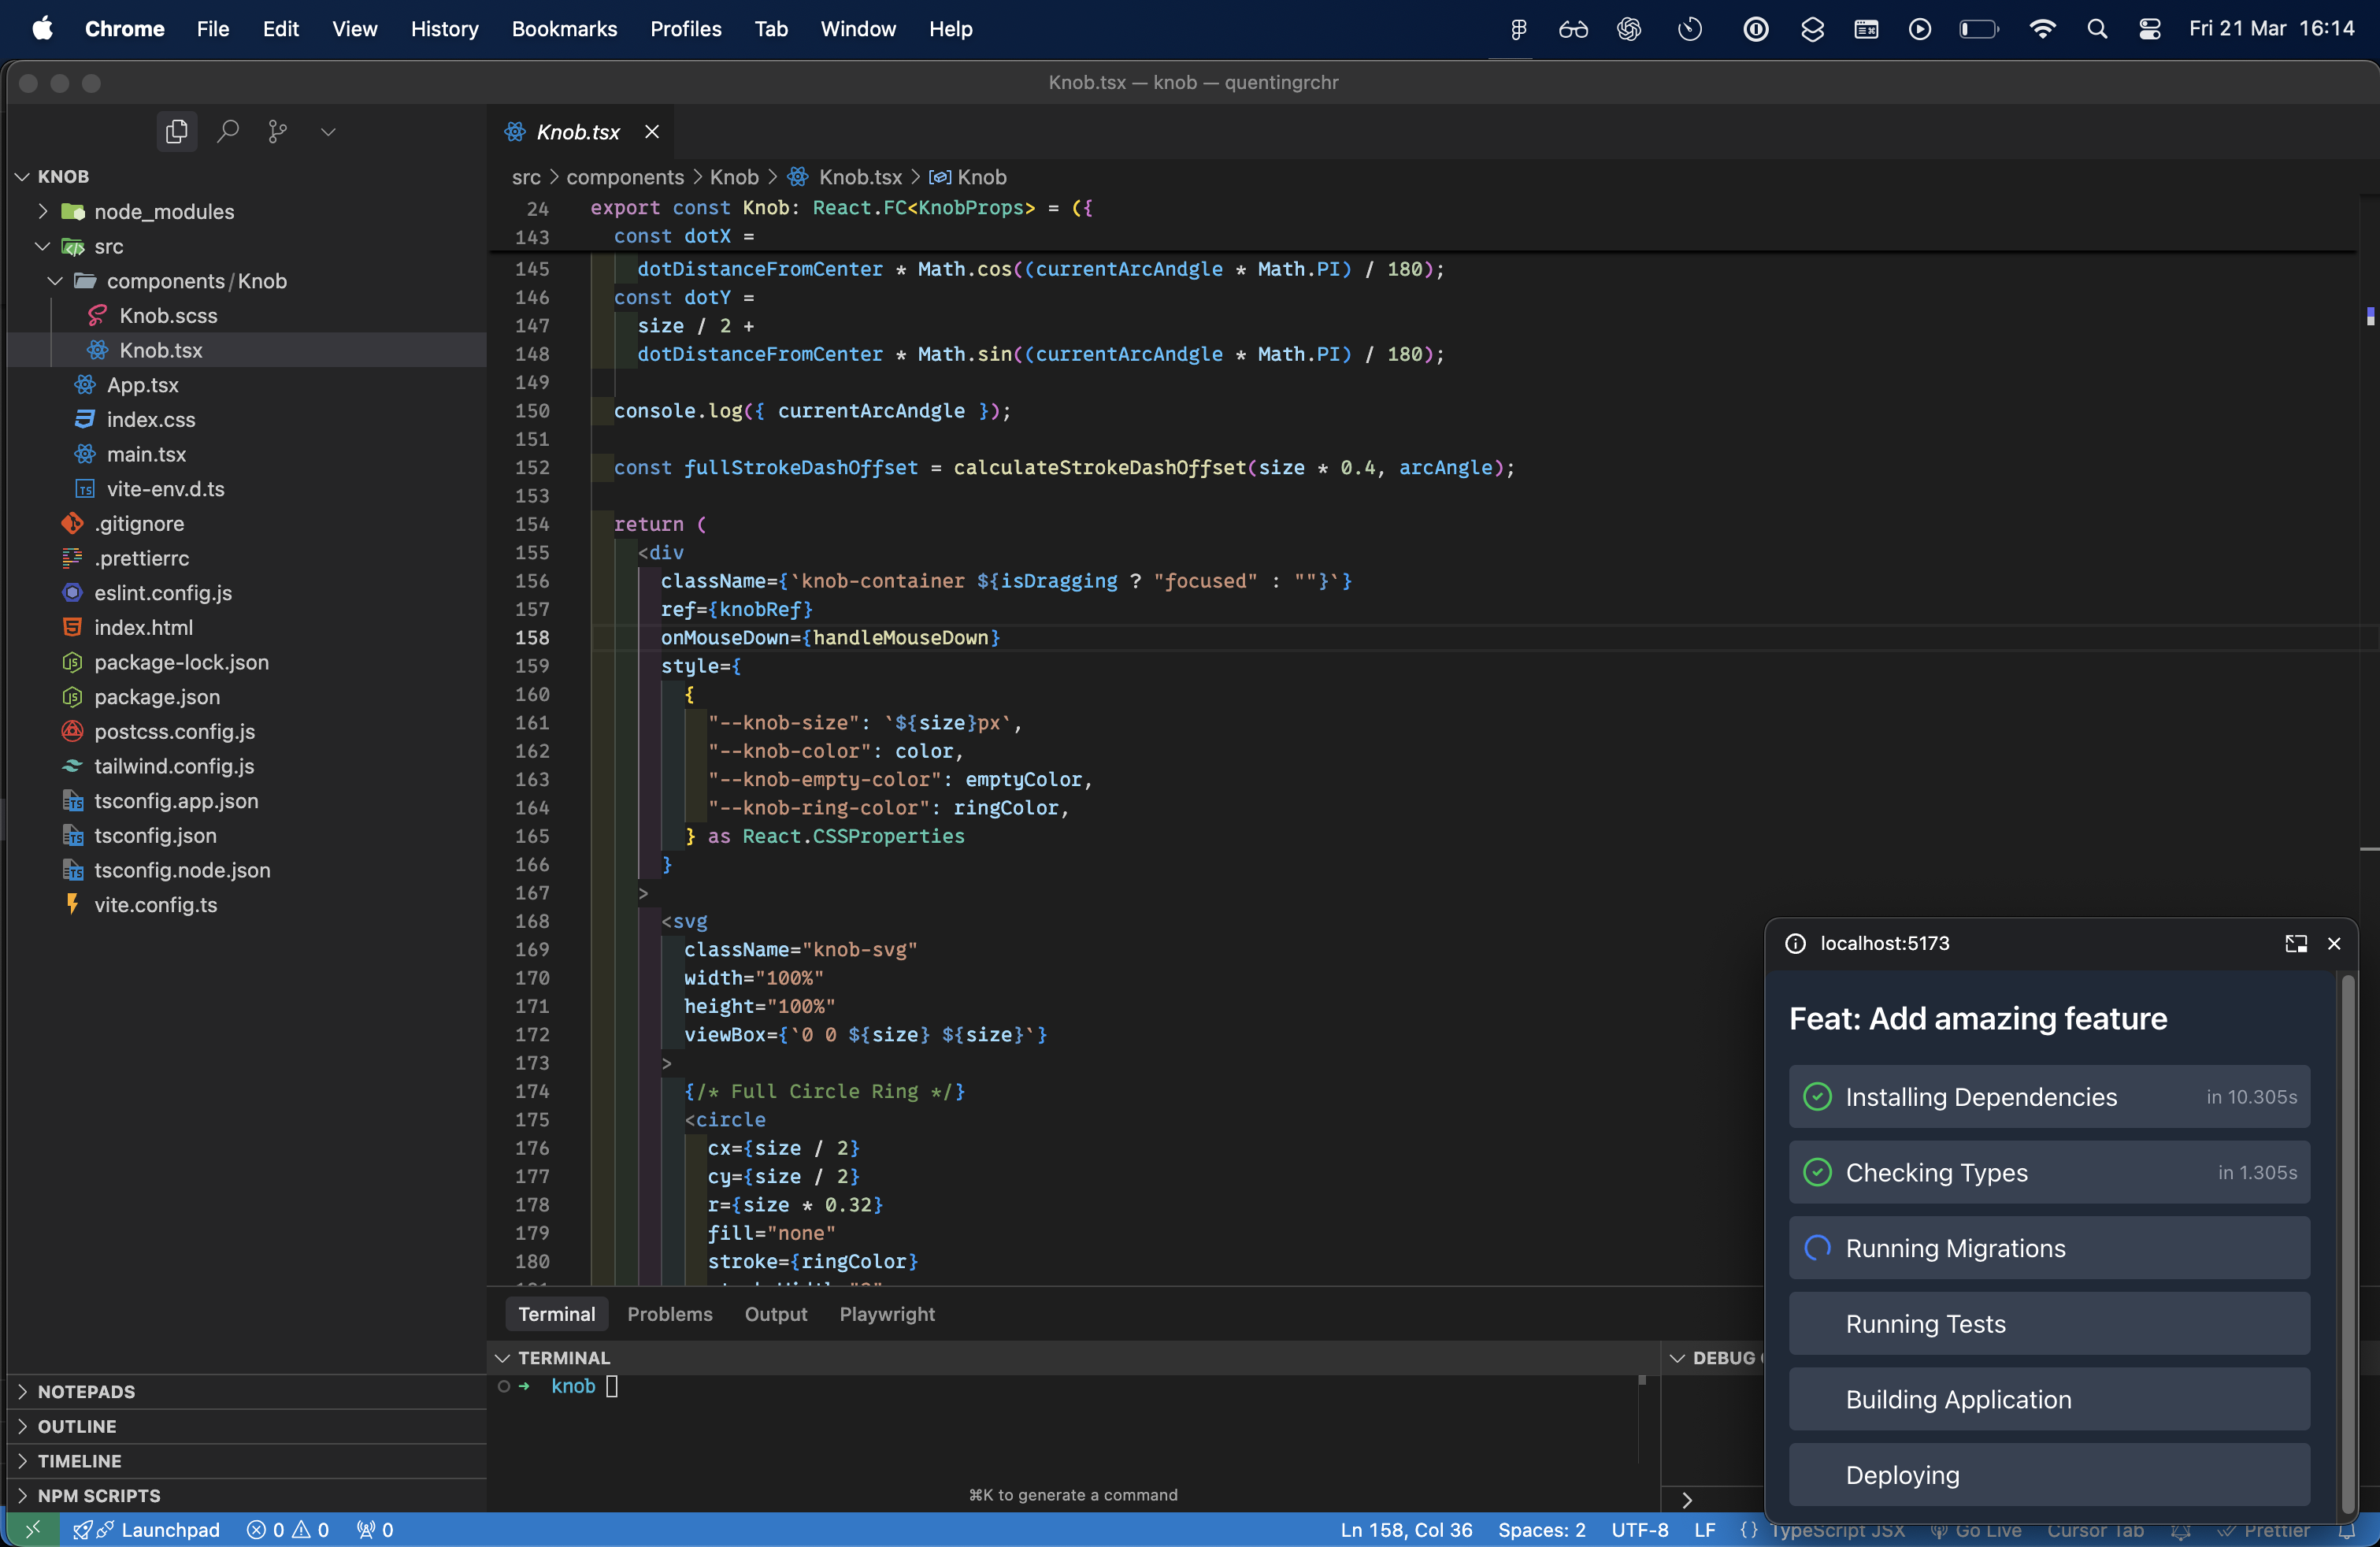
Progress of a build
Sometimes, you may need to monitor the progress of a build, or any process that may take time.
With a floating window, you can keep an eye on the progress of this process while continuing to work on another task.
API Limitations
Although this API is very interesting, it still has some significant limitations to know.
Limited Support
First, its support is currently limited to Google Chrome and Chromium-based browsers.
No Navigation Possible
Next, it's important to note that the PiP window does not allow navigation between different pages or redirection. It's an isolated document, linked to the environment of the main page. The goal is to extend a component of your page, not to create a new autonomous instance of the application.
Only One Floating Window per Tab
For obvious reasons, the browser limits the display to one PiP window at a time (per open tab).
Manual Management of Styles and Scripts
Finally, the style and script system in the PiP window requires manual management. There is no automatic synchronization with the main document, which can represent an additional maintenance effort.
If you want to quickly test Picture-in-Picture behavior on a website. I recommend this Chrome extension which allows you to activate PiP mode on any element of a web page.
Conclusion
The Document Picture-in-Picture API opens the way to more interactive and useful floating interfaces, well beyond simple video. Despite being currently limited to Chrome, it already offers great opportunities for improving the user experience, especially in SaaS contexts or productivity tools. An API to watch and experiment with today.


